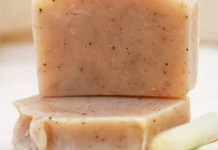
Unmolding Cold Process Soap from the Mold
Unmolding cold-process soap can sometimes feel like unwrapping a present—you’re excited to see what’s inside, but you also want to be careful not to ruin the surprise. After spending time crafting your soap masterpiece, it can be a bit nerve-wracking to take it out of the mold. Here are some friendly tips to make that process smoother and more enjoyable.
1. Choose the Right Mold
The mold is everything when it comes to soap making. From silicone molds to wooden ones, there are plenty of options.
Silicone Molds : These are flexible and help in popping out your soap without causing any harm to the soap. They do not require any additional oils or sprays for easy release.

Wooden Molds : While they provide a sturdy structure, you must line them properly to avoid sticking. Using freezer paper or plastic wrap can help.
It’s similar to baking—using the right pan can change your experience!
2. Allow Enough Curing Time
One of the common mistakes beginner soap makers make is rushing the process.
“Patience is key in soap making. Give your soap enough time to solidify fully.”
Typically, cold-process soap should cure for at least 24 to 48 hours in the mold, but some recipes benefit from longer resting times—up to a week! If you’re impatient like I sometimes am, you might be tempted to unmold early. Just remember: while that first bar might look appealing, it could lead to a crumbly mishap.
3. Use Proper Temperature and Humidity
Have you ever noticed how the weather can affect everything, including your soap?
Temperature: Warmer conditions can speed up the saponification process, making it easier to unmold, while cooler weather can delay it. The ideal room temperature for cold process soap is around 70-80°F (21-27°C).
Humidity: High humidity might make your soap feel tacky and cling to the mold.
Keeping an eye on the temperature and humidity levels can help you prevent any sticky soap situations.
4. Apply gentle pressure
Once you’ve waited the appropriate duration, it’s time to unmold your creation.
Finishing Touch: Gently wiggle or push at the sides of your mold. If you’re using a silicone mold, you can pull it away from the edges a bit.

Wooden Molds: If your soap seems stuck, you can tap the sides gently or use a plastic knife to run along the edges. Just be very careful! Every time I do this, I find myself holding my breath—there’s something so magical about seeing that beautiful bar emerge!
5. Cut with Care
So, your soap is out of the mold. Great job! Now, it’s time to cut.
Sharp Knife: Use a sharp knife or a soap cutter for clean lines. A serrated knife can work beautifully, too—think of it like slicing a fresh loaf of bread.
Wait Before Cutting: It’s often advised to let your soap cure for a few days before cutting into bars. This not only helps it firm up but also allows scents to develop. I remember the first time I cut into a bar too soon—it was a bit of a ragged mess! Allowing your soap to set a little longer is worth it for those uniform slices.

Conclusion
Unmolding cold process soap can be a delightful moment in your soap-making journey. By choosing the right mold, allowing ample curing time, monitoring the environment, applying gentle pressure, and cutting with care, you can reveal beautiful, lovely soap bars that are sure to impress!
So, roll up your sleeves, put these tips into action, and enjoy the sweet satisfaction of creating your soap! Happy soap-making!